If you have a love for anything on four wheels, you also have a love for the wheels themselves. It's probably because of our fascination with one of the biggest inventions in human history – the wheel changed the world for the better. Not only that, but it also opened the Pandora box of speed and style.
Today, the wheel has developed into an object of attraction for many people around the world, with many car enthusiasts fantasizing about putting even better rims on their puppies. But while putting on new wheels can improve the curbside appeal of your car, it also brings some anxiety.
See, wheels are getting bigger, and tires are getting smaller lately, meaning more of the rim is exposed to the ever-more-present curbs and potholes. As a result, most of the large and shiny rims you'll see attached on cars have a curb rash, i.e., unsightly scratches, scuffs, or gouges.
Sure, some scrupulous people that only drive their cars on weekends succeed in keeping their rims pristine, but for most of us, curb rash is an unfortunate reality.
So, how to fix curb rash on rims? Indeed, you can, but not all scratches are easily fixable and might require professional attention. In this article, I'll give you my wheel restoration tips and tricks to keep your wheels looking fresh and shiny. So, without further ado, let's erase the scrapes and revive your ride!
Contents
Understanding Curb Rash
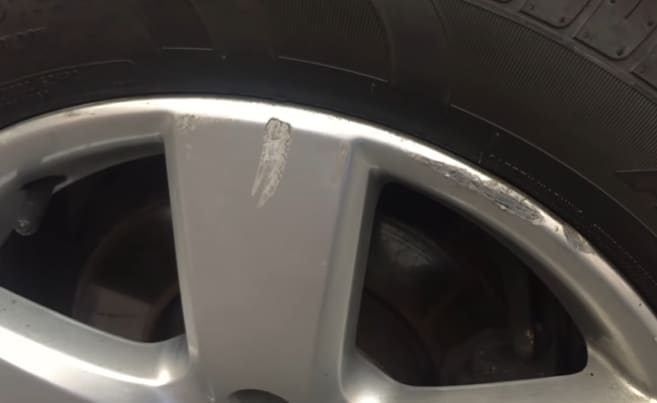
Although it seems like a minor inconvenience, curb rash can transform into a significant problem if not addressed promptly. But what exactly is curb rash, and why should you concern yourself with it?
1. What is Curb Rash?
Curb rash is a term used in automotive circles. It describes various blemishes on the car's wheels or rims caused by scraping or hitting them against a curb or another hard surface. It is a common occurrence on wheels that spend most of their time in urban driving scenarios.
Most often, it happens during parallel parking, where the driver can't really see whether the wheels are touching the curb or not. However, it can also happen when taking tight corners or driving too close to the curb when cornering.
Fortunately, in most cases, curb rash is a cosmetic issue that won't affect the performance or safety of the vehicle. Nonetheless, I would still check the rim after scraping or hitting it because more severe damage can lead to more serious problems, like, for example, a quick tire pressure loss.
2. The Impacts of Curb Rash on Your Vehicle
Minor curb rash is only a cosmetic issue that won't affect the performance of the wheel. In other words, the wheel will keep its structural rigidity, and the rim will still hold the tire strongly to ensure no air is escaping from inside. Also, minor scratches usually don't affect the protective coating, so the wheel should still be resistant to oxidation or rust.
However, that is not to say that it won't impact your wallet. Every minor scratch on the wheels can significantly decrease the resale value of your vehicle. Prospective buyers often consider the condition of the wheels as an indication of how well the vehicle has been maintained and will use the curb rash to get a higher discount.
With that said, deeper scratches or gouges can penetrate the wheel/rim further and cut through the protective coating. As a result, the underlying metal will be exposed to the elements, making it more susceptible to rust (steel wheels) or oxidation (alloys). The issue is more prevalent among cheaper rims, but nonetheless, it can deteriorate the structural integrity of the wheel, causing serious safety issues.
Additionally, if the curb rash is deep enough to affect the wheel's shape or balance, it could potentially impact driving dynamics. It could lead to an uneven ride, increased tire wear, or in extreme cases, a blowout.
Fortunately, there is a silver lining to curb rash – it can be repaired. Unlike other types of damage to the wheels, like cracks or bending, curb rash can be repaired 95% of the time. In most cases, you can even do the repairs yourself, using products that are readily available online.
Assessing the Damage
Want to tackle the curb rash yourself? Well, before you do that, it would be smart to asses the extent of the damage, i.e., whether it is minor and superficial or a deep gouge that can affect the strength of the wheel.
And there is no better way to start than by cleaning the wheels. I highly recommend using special wheel/rim cleaners, as they have special detergents that can remove all dirt, grime, and brake dust, ensuring that you have a clear view of the damage. Once you finish cleaning each wheel, dry the wheel with a soft and clean cloth.
Remember, the wheels are constantly in contact with all those contaminants, which build up over time and can't be removed with a simple car wash.
Now, kneel down before their majesty, your wheels, and look for any areas where the metal may be exposed or where the wheel's shape might be compromised. If you notice any significant indentations, deep scratches, gouges, or deformed areas, this could indicate more serious damage. However, small and shallow scratches are only cosmetic issue that is easy to tackle and repair.
1. Identifying Minor vs. Major Curb Rash

Minor vs. major curb rash on rims
Minor curb rash typically presents as superficial scratches or scuffs on the wheel's surface, primarily affecting the paint or clear coat. In other words, if no shiny metal is visible, the scratch is shallow. These blemishes are often cosmetic and can generally be fixed at home with a few basic tools and materials.
However, deeper gouges will expose the metal underneath the protective coating and might also affect the wheel shape. Major curb rashes are harder to repair using DIY skills, but more importantly, they are a safety issue that needs to be tackled immediately. Notably, they can affect the performance and handling of your vehicle and might lead to serious problems, like a blowout.
2. When to Seek Professional Help
While you can easily repair minor curb rashes, I strongly recommend seeking professional help for major curb rashes, like deep scratches and gouges. This is especially true if the structural integrity of the wheel is compromised, as that can be a serious safety issue.
It is important to note that professional technicians have access to specialized tools and materials that can provide a seamless repair, making the damage virtually undetectable. You can do a fine job on minor scratches using kits purchased online, but these low-cost solutions won't do as good of a job as professional tools.
Gathering Your Repair Materials
As I said, you can repair minor curb rash using special kits you can acquire online or at special auto part shops. There is a variety of different kits available, each designed to tackle scratches and gouges of various depths.
With that said, most of these kits contain the following items:
- Sandpaper in a variety of grits (roughly 220, 400, 600, and 1000 or higher)
- Primer (specifically designed for wheel or auto body use)
- Color-matched paint (if your wheels are painted)
- Clear coat (designed for wheel or auto body use)
- Wheel cleaner and a brush or sponge
- Clean cloths or rags
- A spot putty or body filler (for deeper gouges)
- A putty knife or spreader (for applying the putty or filler)
- Masking tape and plastic sheeting (to protect surrounding areas during the repair process)
As you can see, there is nothing really special about these kits, meaning you can make your own by purchasing every single item. However, the curb rash repair kits usually contain smaller quantities of each item and will be more cost-effective. If you are a professional technician, though, it would be smart to have higher quantities of each item and purchase them separately.
1. Tools Needed for Curb Rash Repair
Purchasing the wheel scratch repair kit will get you most of the way, but you will still need some hardware to finish the job:
- A jack and jack stands: To ensure your safety while working on the wheel.
- A tire inflator and pressure gauge: To ensure your tires are properly inflated after the repair.
- A heat gun: To speed up the drying process between paint layers.
- A spray gun or paint brushes: For applying primer, paint, and clear coat.
These are easy-to-acquire tools that most DIYers already have in their garages. If you don't have some of these tools because you never needed them, you might want to borrow them from a friend to finish the job, as they can be costly.
2. Choosing the Right Repair Kit
Buying a wheel repair kit is definitely the most convenient and cost-effective option for people that just want to bring the shine back to their wheels and don't have previous DIY experience.
Still, there are some important things to consider. Namely, not every wheel is similar – some are made from steel, others from aluminum alloys. Moreover, the wheel finish is also different from one model to another, and even among alloy wheels, there is a difference between the cheaper cast alloy wheels and higher-quality forged alloy wheels.
Thus, when selecting a kit, it would be smart to consider the following factors:
- Wheel Finish: Make sure the kit is suitable for your type of wheel finish.
- Color Match: If your wheels are painted, look for a kit that includes paint or that provides a method for you to get color-matched paint.
- Inclusion of Essential Items: Check that the kit includes or suggests all the necessary items for the repair process.
With that said, I also recommend checking online reviews from people that already used the kit. Obviously, look for kits that have positive reviews, as these often indicate a reliable product that gets the job done.
Step-by-Step Guide on How to Fix Curb Rash on Rims at Home
Now that you gathered all the materials, it's time to get your hands dirty. Okay, not really – make sure you wear protective gloves, as you don't want colors or coatings touching your bare skin. Once you ensure you are protected, it's time to tackle the curb rash!
Remember that tackling the curb rash requires patience, as rushing will almost certainly result in a poor finish.
Step 1. Cleaning the Damaged Area
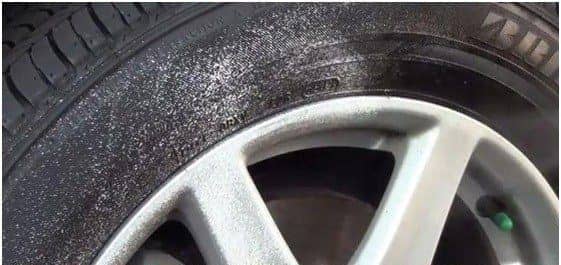
Before you even start repairing the curb rash, it is crucial to clean the wheels from any dirt, brake dust, and road debris. By doing this, you will ensure that the new coating will be applied well without any bubbles forming.
For this, I highly recommend using specialized wheel cleaners. You can also use soap, but the wheel cleaner has special detergents inside that can clean any dirt or brake dust effectively while also protecting your wheel. Purchase wheel cleaners from reputable manufacturers, as from my experience, they are far better at doing their job.
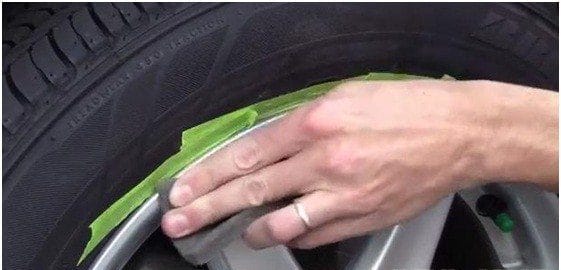
Combine the wheel cleaner with a soft brush or soft sponge. Most of these come in kits with the wheel cleaner and ensure thorough cleaning without damaging the clear coating or paint. I like to use brushes of different sizes; I use the largest for cleaning the easy-to-reach areas and the smallest for the small spaces. Regardless, I always make sure the whole wheel is thoroughly cleaned.
Once you brush the wheels, rinse them with water and dry them thoroughly. Ensure there's no moisture left in the damaged areas.
Step 2. Sanding the Rash
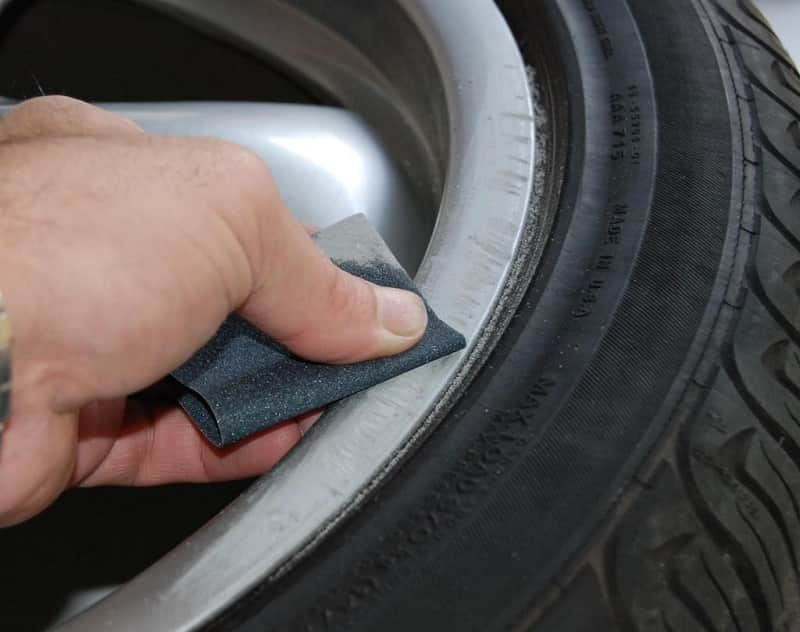
Sanding is crucial when repairing wheels, as it helps to even out the surface of the wheel and remove any sharp edges caused by the curb rash.
Always start sanding with coarser-grit sandpaper, like 220-grit, for example. This will help to remove the roughest parts of the curb rash, but it won't create a clear finish.
Continue progressively to higher grits. For instance, you can use 400-grit next, then 600, 1000, and even 2000-grit for best results. Your goal will be to create a smooth surface whereon you can apply the primer, coating, and/or paint.
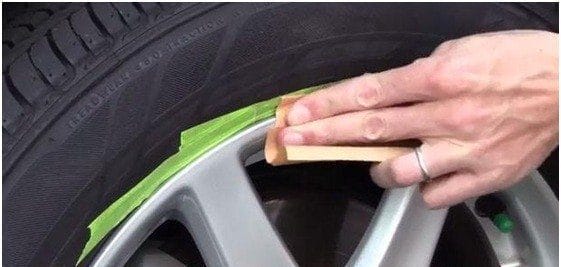
If the scratch is near the tire rim, you should apply tape around it to prevent damaging the tire.
Step 3. Applying the Filler (for Severe Curb Rash)
Sanding deep gouges and scratches won't be smart, as you would need to remove a lot of material for the surface to be smooth. Instead, you should use a filler on more severe curb rash, which will penetrate the scratches/gouges and even it out.

Start by applying a small amount of spot putty or body filler to the damaged area using a putty knife or spreader. Distribute the filler so it's slightly higher than the surrounding surface, as it will shrink as it dries.
Allow the filler to dry completely as per the manufacturer's instructions, then sand it smoothly using fine-grit sandpaper.
Step 4: Cover the area around
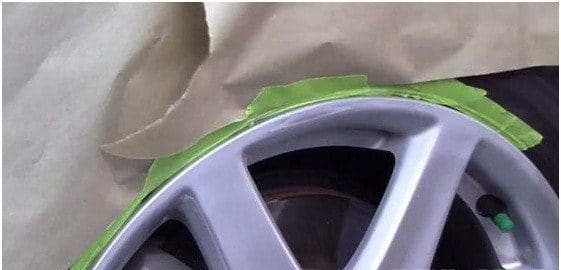
Once you ensure the surface is smooth, it's time to apply the paint. Before you apply the paint, tape off the surrounding areas (those you didn't sand) to protect them from overspray.
Step 5: Spray primer on the rims
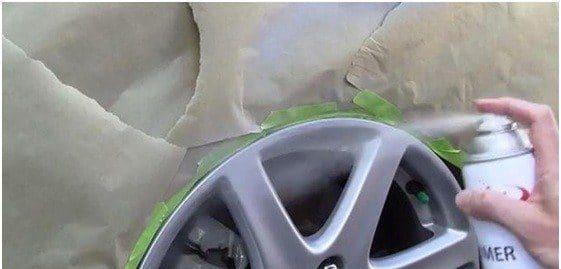
Then, apply a thin coat of primer. Remember to keep a distance of 6 inches while painting between the paint can and the rim. The primer is very important, as it ensures good adhesion between the paint and the surface.
Moreover, it ensures durability, helps to protect the bare metal, and ensures a smoother finish. Not to mention, grey primer can also make the paint appear more vibrant. Apply multiple coats if necessary and aim for a smooth finish. Then wait a few minutes for the paint to dry before moving on to the next step.
Step 6. Paint Color
After the primer, you can apply the color-matched paint. Make sure you purchase the exact paint as recommended by the wheel manufacturer, as even small differences can be easily seen by the naked eye. Once the paint is dry, apply a clear coat to seal the paint and provide a glossy finish.

Let everything dry completely before driving your car. For best results, I recommend leaving the car overnight.
For details, check out this video!
Video created by Justin Buice
How Long Does the Repair Process Take?
The duration of the repair process can vary depending on several factors, including the extent of the damage, your skill level, and the specific repair steps you need to follow.
With that said, repairing curb rash isn't a quick job. In my experience, you can expect to spend anywhere from 2 to 3 hours on each wheel, though you will be active around 60% of the time.
Notably, the process includes time for cleaning the wheel, sanding and smoothing the damaged area, applying and drying the filler, painting, and allowing the paint to dry fully.
However, experienced DIYers and professionals can finish the job much faster, so take everything with a grain of salt.
Still, my advice would be not to think about how quickly you can finish the job and instead focus on doing it correctly.
Tips for Preventing Future Curb Rash
Once you finish repairing the curb rash on your wheels, the next logical step would be to be more careful the next time you drive your vehicle. No one likes seeing their beloved car's rims scratched up, not to mention the time and effort it takes to fix them. I mean, for some of us, spending time in our cars is fun, but do you know what is more enjoyable? Driving your car, of course! Here is how to do it right!
1. Practicing Safe Parking Techniques
Scraping the wheels against the curb is by far the most common cause of curb rashes. It's where the name comes from!
But how do you park safely? Well, first of all, I highly recommend being slow and smooth. You can't really see or feel the curb if you hurry when parking your vehicle.
Also, use the rear-view and side mirrors to your advantage. You might even lower them slightly to see what the wheels are doing (on some cars, they automatically lower down when you shift to R).
Furthermore, avoid tight parking spots. If a parking spot seems too narrow, it's better to search for another one instead of risking scraping your rims.
2. Using Rim Protectors
Rim protectors are a cheap and straightforward solution to curb rash on the rim (outer part) of the wheel. They provide an extra layer of protection and are always the first to take the hit when you hit a curb. Rim protectors are bands made of tough plastic or rubber that attach to the edge of your rims. They provide a buffer zone between your rims and curbs or other obstacles.
But rim protectors aren't only used to protect your wheel – you can even improve its aesthetics by covering the existing scratches. They even come in various colors, matching most of the wheels that are rolling on roads today. You can even put a different color to change the appearance of your wheels!
Most rim protectors can be installed at home, though some higher-quality models require professional installation to ensure they are securely attached. Either way, they are a very cost-effective solution, especially for drivers who frequently park in urban areas with lots of curbs and tight parking spaces.
Conclusion
Curb rash can break your heart, but it won't necessarily break your wallet. As I've demonstrated in this article, minor to moderate curb rash is something that can be tackled at home with the right tools, materials and a bit of patience. You don't even need advanced DIY skills for the job!
However, it's crucial to evaluate the severity of the curb rash, as not all damage is equal. If you think that the scratches and gouges are too deep, it might be better to seek professional help. Wheel technicians have the right tools and knowledge to repair any issue with your wheels and ensure road safety!
I’m Ivo Gievski, the content writer for Tireer. We built our website with over 15 years of experience and extensive research in the automotive and technology sectors. My dedication to delivering high-quality content is unwavering, and I strive to continuously hone my skills to stay ahead of industry trends and provide readers with informative, engaging, and valuable insights.